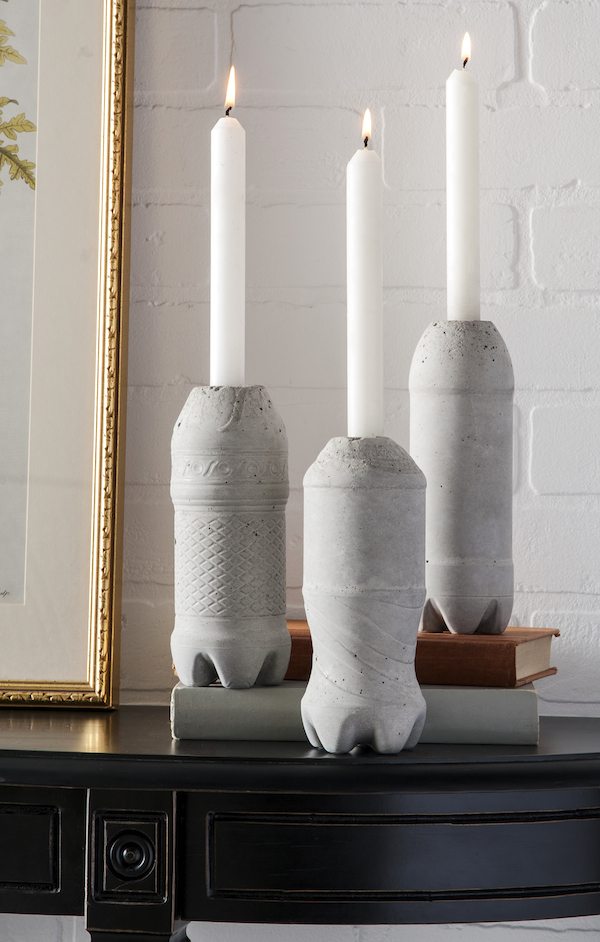
Concrete vases possess a certain allure – they appear as if they were hewn from solid stone
and meticulously polished. The best part? You can create your own set of these exquisite vases
using plastic or glass bottles, each with a unique charm. In this DIY guide, we’ll walk you
through the process, from the materials you’ll need to the step-by-step instructions for crafting
your very own concrete paver mold vases.
Materials Needed:
Dry concrete mix (available in various shades)
Plastic and glass bottles with caps
Pencils, test tubes, or long candles
Containers for cement mortar
Drill
Sharp knife
Pliers
Step 1: Prepping the Bottles
Begin by preparing the bottles. To make the task of filling the bottle with the concrete mixture
easier, cut off the bottom of plastic bottles. For glass bottles, opt for those with the widest neck
possible.
Step 2: Drilling Holes
Seal the bottles with their caps, and then carefully drill holes in them. These holes should be
large enough to firmly insert your chosen object – whether it’s a test tube, candle, or pencil.
These openings will serve as placeholders for the flower stems. If you’re working with a large
bottle, you can use a smaller bottle as a container.
Step 3: Bottle Readiness
Ensure that the bottles are completely dry and clean. Now, mix the dry concrete with water until
it reaches the consistency of sour cream. Seal the plastic bottles with the cut-off bottoms using
their lids, insert your chosen object, turn them upside down, and place them in containers.
Carefully pour the concrete mixture through the hole. For glass bottles, pour the solution first
and then insert a straw. Expect a certain amount of the mixture to be forced out when working
with glass bottles. Tap the bottles gently to release any trapped air bubbles.
Step 4: Concrete Setting
Allow the concrete in the plastic bottles to stand for at least a day before cutting off the bottles.
This is the time to ensure the bottom of the vase is perfectly flat. For glass bottles, wait 4-5 days
before proceeding. When cutting the plastic bottle, use a sharp knife, taking care not to damage
the vase’s walls. The concrete will not have completely hardened, which works in your favor. For
glass bottles, break them with a hammer, using fabric folded several times to protect your
hands.
Step 5: Removing the Middle
To remove the object you inserted in the center, heat it with a hairdryer if it’s a candle or plastic
handle. Then, carefully pull it out with pliers or your hands. For glass flasks, you can break them
with a screwdriver and remove the fragments. If the test tube is the size of a vase and doesn’t
protrude, you can leave it in the middle for added flair.
Master Class: Concrete Vases in Cardboard Molds
Now that you’ve mastered creating concrete vases with bottles, let’s explore another exciting
technique using cardboard molds. These molds can be fashioned into various shapes, allowing
you to create unique flowerpots, vases, candles, and decorative interior elements.
Materials Needed:
Dry concrete mix
Bottles, jars, test tubes, or similar items for the vase’s center
Cardboard or heavy paper (you can repurpose small cardboard boxes)
Paper glue
Paint for the interior/facade
Scotch tape (electrical tape)
Knife or scissors
A container for grout and a stirring stick
Step 1: Prepare Cardboard Forms
Begin by preparing cardboard forms. You can use standard cardboard boxes with slight
modifications, cardboard coffee cups, or even cut out and glue your own unique shapes from
paper.
For smaller vases or candles, print the template on an A4 cardboard sheet. For larger vases,
opt for A3-sized templates. Photo paper can also serve as a suitable material. Cut along the
dotted lines, fold along the solid lines as indicated (using a ruler to help), and glue the shapes
together.
Step 2: Exterior Paint
Paint the outside of the cardboard mold. This step is crucial to ensure that the glued joints are
securely sealed. If you’re using a pre-made box or are confident in your seam gluing skills, you
can skip this step.
Step 3: Filling the Mold
Mix the dry concrete with water until it reaches the consistency of thick sour cream. Fill the
cardboard molds with the concrete mixture. For the vase’s center, you can use candles, pens,
test tubes, or thin bottles. If you’re aiming for something more unique like a coat hook or
doorknob, insert a self-tapping screw into the wet concrete.
Step 4: Allow to Dry
Leave the concrete in the molds to dry for 1-2 days. To remove a candle or plastic handle, heat
it with a hairdryer. After a day, the concrete will still be slightly damp, allowing you to trim any
irregularities with a sharp knife if desired.