Concrete, with its unparalleled durability and versatility, is the cornerstone of countless construction projects. Whether you’re creating a concrete slab for a driveway, patio, or any other structure, achieving the perfect finish is an art that requires the right tools, techniques, and attention to detail. In this comprehensive guide, we will delve into five essential tips and tricks to help you master the art of concrete finishing, ensuring that your concrete projects not only stand the test of time but also exude professional quality.
1. Gather the Essential Tools
Before embarking on your concrete finishing journey, it’s crucial to equip yourself with the right tools. Here are some indispensable items you’ll need:
Quality Ready-Mix Concrete: Begin by contacting a reputable supplier of ready-mix concrete. Choose a mix that aligns with your project’s specifications while staying within your budget.
Five-Gallon Bucket: Ideal for mixing concrete with ease and precision.
Electric Concrete Mixer: For larger projects, consider using an electric concrete mixer, a towable concrete mixer, or a wheelbarrow mixer to streamline the mixing process.
Darby or Bull Float: These tools help flatten the concrete surface and ensure uniformity.
Magnesium Float or Hand Float: To achieve a smooth and flat surface, use a magnesium float or hand float.
Edging Tools: Pay attention to the edges, as they significantly impact the overall appearance of your concrete structure.
Grooving Tool: Essential for creating control joints that prevent cracking and provide a finished look.
Concrete Dye: If you want to enhance the visual appeal of your concrete, consider using concrete dye to add color and even create intricate designs.
Broom or Concrete Brush: These tools help create texture on the surface, enhancing safety by preventing slippery, smooth surfaces.
By having the right tools at your disposal, you’ll be well-prepared to achieve a professional finish.
2. Choose the Right Concrete Mix
The quality of your concrete mix is paramount to achieving a perfect finish. Not all concrete mixes are created equal, and the choice of mix should align with your specific project requirements. Factors to consider when selecting a concrete mix include:
Environmental Conditions: Consider the climate and temperature variations your concrete will face. Some mixes are better suited for extreme temperatures, while others are designed for durability under heavy loads.
Supplier Recommendations: Consult with your concrete supplier for recommendations on the most suitable mix for your project. They can provide valuable insights based on their expertise.
Project Specifics: Evaluate the unique demands of your project, such as the load-bearing capacity required, structural needs, and aesthetic preferences.
Admixtures: Depending on your project, you may need to incorporate admixtures into the concrete mix to enhance properties like workability, strength, or curing time.
By selecting the right concrete mix, you lay the foundation for a successful finishing process.
3. Master the Pouring, Tamping, and Troweling Process
The process of pouring, tamping, and troweling concrete is critical to achieving a flawless finish. Follow these steps to ensure a smooth surface:
Pouring: During the pouring phase, avoid creating bubbles that can lead to craters later. Pour the concrete evenly and ensure it reaches all corners of the formwork.
Tamping: Tamping is the process of consolidating the concrete to eliminate air voids and ensure proper compaction. Be gentle but thorough to avoid weakening the slab.
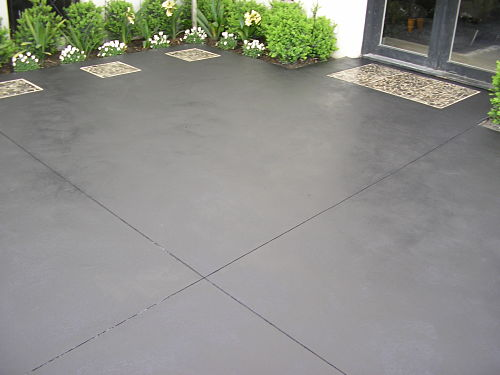
Troweling: After tamping, use a magnesium float or wooden trowel to smooth the surface. This process, known as troweling, creates a sleek and uniform finish.
4. Perfect Timing for Finishing
Timing is everything when it comes to concrete finishing. Avoid two common mistakes: over-troweling and troweling too soon. Over-troweling can pull excess water to the surface, leading to a white, dusty appearance and potential cracking. Conversely, troweling too soon can disrupt the curing process. Consider the weather conditions, as concrete sets more slowly on warmer days. Be patient and allow the concrete to set to the optimal stage for finishing.
5. Add Creative Flair with Concrete Dye
Concrete finishing isn’t just about functionality; it’s also an opportunity for creativity. Concrete dye allows you to add color and character to your project, turning a basic concrete structure into a work of art. Whether you aim to replicate the look of stone, marble, brick, or tile, concrete dye provides the flexibility to express your unique vision.
Conclusion: Elevate Your Concrete Craftsmanship
Mastering the art of concrete finishing is a journey that combines skill, knowledge, and dedication. By equipping yourself with the right tools, choosing the appropriate concrete mix, mastering the pouring and troweling process, timing your finishing perfectly, and incorporating creative touches with concrete dye, you can elevate your concrete craftsmanship to professional levels. Each project you undertake will become a testament to your commitment to quality, ensuring that your concrete structures not only endure but also captivate with their flawless finishes. Whether you’re a seasoned professional or a DIY enthusiast, these tips and tricks will empower you to achieve the perfect concrete finish every time.